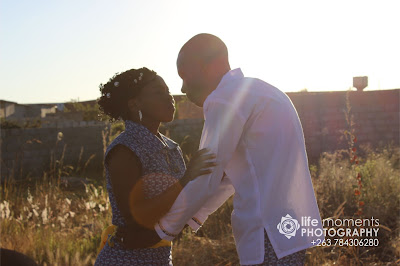
1. Expose for the sky
Before tearing a couple away from their guests, get a head start on sunset photos by setting your camera exposure correctly if time allows. You want to make sure the texture and detail of the coloring in the sky don’t get lost. Keep your ISO as low as possible to achieve the look you want in the background. Depending on the amount of light, I’m able to keep my ISO around 200-400. Keeping your aperture wide open gives you the most latitude with your flash.
 |
| Picture by Life Moments Media. Sunset in Dema, Chitungwiza. |
2. Use a tripod
A tripod is a great way to stay consistent with your shots, keep your ISO low and compose each photo just the way you want. It also frees you up to focus on directing the couple (or your assistant if you are able to do some test shots) and adjusting the amount of your off-camera flash without having to re-frame each shot. The tripod is especially helpful when you don’t have an assistant to help.
 |
| Picture by Life Moments Media. Oudney Patsika taking a picture. |
3. Choose a light modifier
Now that you’ve correctly exposed for the background, it’s time to introduce your flash. I usually work with one off-camera flash, shot through a white umbrella. This puts a nice, soft light on the couple, gives an instantly dramatic effect with the sunset in the background, and requires little effort when time constrained. It helps to have the umbrella as close as possible without being in the frame to get that nice soft light.
 |
| Picture by Life Moments Media. Ibrahim Kamari taking a picture. |
4. Adjust your flash power
Adjusting your flash power through a light modifier is easiest when working with an assistant or second shooter. I usually start with the flash around 1/8 or 1/4 power and adjust from there. Watch your shutter speed—you want to make sure you’re not creeping too high to sync with your flash. Typically this is 1/200 second or slower. If your flash is too strong, adjust it down to get your desired lighting on your subject. You typically don’t want to adjust the shutter speed or aperture because it will change the way your background looks. However, as the sun goes down and the background gets darker, you may want to slow the shutter speed or open the aperture to keep detail in the background.
Brighter sky means more power from the flash to compensate
 |
| Picture by Life Moments Media. Video filming Apostle Pride Sibiya in Birchenough Bridge. |
5. Pose your couple
Once you have your settings locked in, it’s time to grab your clients if you haven’t already. Let them know what you want them to do. If it is very dark, we like to use an LED light or light on our cell phones to light the couple enough to get the camera to focus. Once the focus is set, turn the autofocus off and turn your LED light off.
 |
| Picture by Life Moments Media. Primrose and Gibson Chibika. |
6. Shoot without flash
Depending on the amount of light we have at sunset, I will often pose the couple in front of the sunset to create a silhouette effect that is very dramatic and beautiful. It doesn’t require shooting with off-camera flash either, so it’s a great option for a quick and dramatic photo that your clients will love, without the extra equipment and hands.
 |
| Picture by Life Moments Media. Patience |
What’s your best tip for taking romantic sunset photos?

